You must have Trusted Platform Module (TPM) 2.0 to install Windows 11 – Microsoft has made it clear while launching Windows 11. Here is how you can turn on or enable TPM 2.0 in Gigabyte motherboard to install Windows 11.
TPM or Trusted Platform Module is a hardware-level security chipset that prevents various attackers from attacking on your computer. In simple terms, Microsoft opted for TPM as the Windows 11 hardware requirements to protect end-users against various firmware attacks. However, the same thing created a panic and mess among normal computer users because most of the old hardware do not have TPM 2.0. That is why you might get This PC can’t run Windows 11 while using PC Health Check app. However, there is a big chance that you already have TPM 2.0 but you are not aware of not – feeling same? Don’t worry, you are not alone. Microsoft released few documents, allowing people to know whether their processor is compatible with Windows 11 or not.
Windows 11 compatible Intel processors:
https://docs.microsoft.com/en-us/windows-hardware/design/minimum/supported/windows-11-supported-intel-processors
Windows 11 compatible AMD processors:
https://docs.microsoft.com/en-us/windows-hardware/design/minimum/supported/windows-11-supported-amd-processors
Windows 11 compatible Qualcomm processors:
https://docs.microsoft.com/en-us/windows-hardware/design/minimum/supported/windows-11-supported-qualcomm-processors
If your processor is listed on the official list, you can enable TPM 2.0 using BIOS. Here is how you can check and activate TPM 2.0 in Gigabyte motherboard. However, it is possible to enable Trusted Platform Module in Asus, MSI, Intel, Biostar, etc. motherboards as well.
How to enable TPM 2.0 in Gigabyte motherboard
Follow these steps to enable TPM 2.0 in Gigabyte motherboard:
- Restart your computer and press Delete button to enter BIOS
- Go to the Peripherals tab.
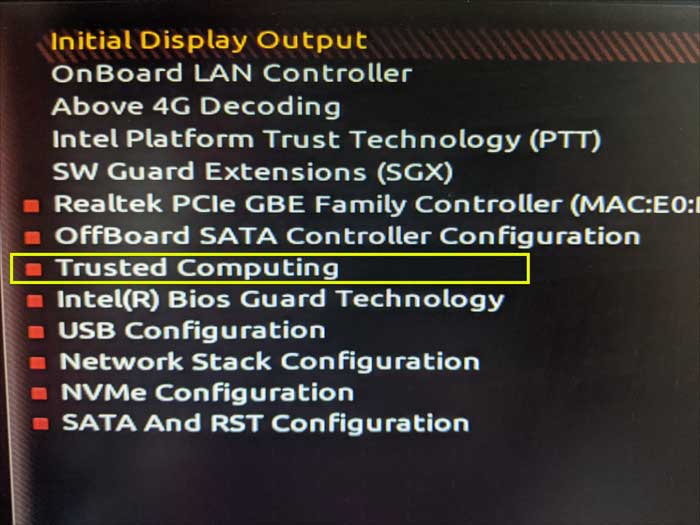
- Use the keyword’s up/down keys to select Trusted Computing option.
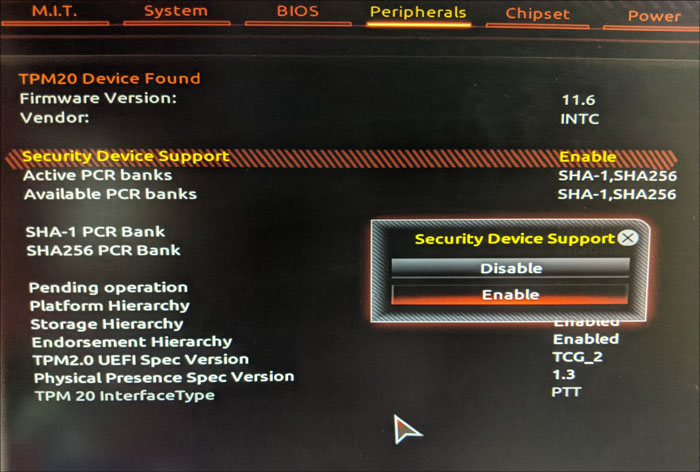
- Expand Security Device Support and choose Enable.
- Save settings and exit BIOS to enable TPM 2.0 in Gigabyte motherboard.
To get started, restart your computer and press the Delete button to enter BIOS settings. However, if your motherboard has a different key, press that designated key while restarting to open the BIOS settings.
Once the BIOS settings page is opened, go to the Peripherals tab and use your keyboard’s up/down arrow keys to select Trusted Computing option.
Then, you can expand the Security Device Support and choose Enable from the list.
Now, save the change and exit BIOS.
To verify whether you have successfully enabled it or not, press Win+I to open Windows Settings and go to System > About.
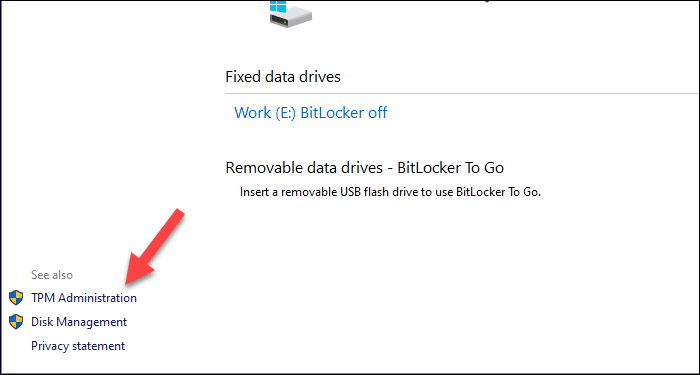
Scroll down to the bottom and click on the BitLocker settings option.
On your left-side, you can find TPM Administration option and you have to click on it.
After that, you can find the Status as The TPM is ready for use. On the other hand, you can see the Specification Version as 2.0.
How do I know if TPM 2.0 is enabled?
To know if TPM 2.0 is enabled on your computer, you need to open Windows Security, and go to Device Security. Click on the Security processor details option. Here you can find the TPM version. If you cannot see the version, TPM is not enabled.
How to enable TPM 2. 0 in BIOS?
Final word: Enable TPM 2.0 in Gigabyte motherboard
Enabling TPM 2.0 in Gigabyte motherboard is not that difficult and you can do it within moments. As Microsoft has made it the hardware requirement, you have to enable this functionality to install Windows 11.