While running the PC Health Check app, if you are getting This PC can’t run Windows 11, or The PC must support TPM 2.0, or The PC must support Secure Boot error, you can fix it using this tutorial. It is possible to install Windows 11 even if your PC doesn’t meet the minimum system requirements of Windows 11.
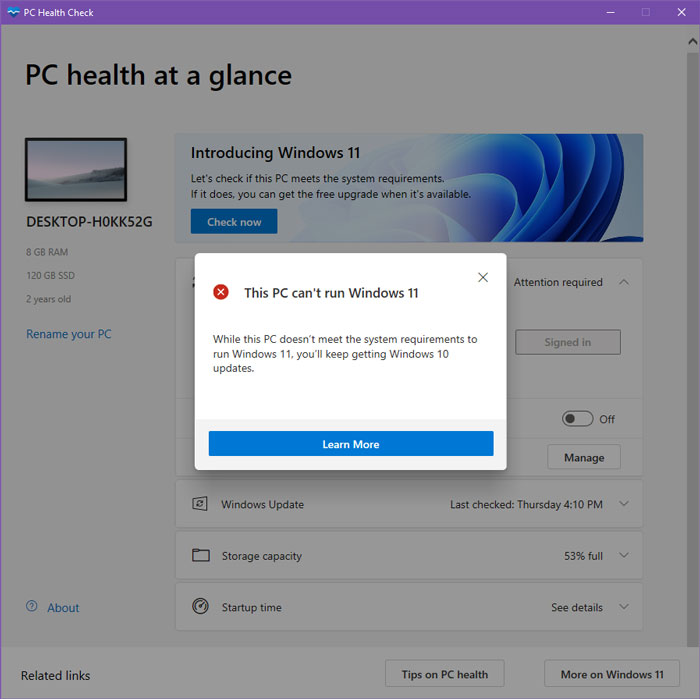
Microsoft recently announced Windows 11 with some hardware upgrade. Like Windows 10,8.1, or 7, you cannot install Windows 11 on any computer you might already have. While running the PC Health Check app, you might get an error saying this:
This PC can’t run Windows 11
While this PC doesn’t meet the system requirements to run Windows 11, you’ll keep getting Windows 10 updates.
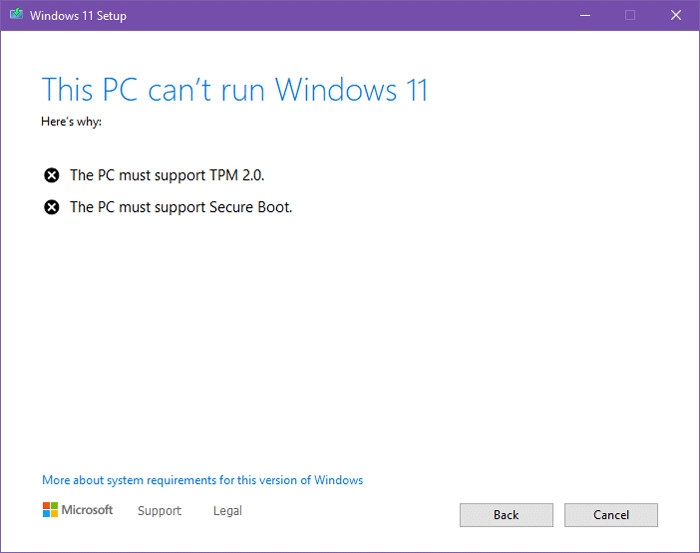
On the other hand, if you run the Windows 11 Setup file on your Windows computer, you might get the following error:
This PC can’t run Windows 11
The PC must support TPM 2.0.
The PC must support Secure Boot.
However, you might not have those functionalities in your motherboard. That is why you should follow this tutorial to learn how you can install Windows 11 without TPM 2.0 and Secure Boot support.
TPM or Trusted Module Platform is a layer of security to prevent a safeguard against overuse of cryptographic keys on your Windows computer. It has been there in the market since a quite long time now and if you have bought processor launched after 2016, you might already have it. However, the TPM 2.0 is quite new and it might be the problem since it requires UEFI boot instead of Legacy mode. On the other hand, you must have Secure Boot enabled to get everything going.
However, if you can replace some files in the original Windows 11 ISO, you may be able to install Windows 11 without Secure Boot and TPM 2.0. For that, you must have to download Windows 10 ISO and Windows 11 ISO on your computer.
How to fix TPM 2.0 and Secure Boot to install Windows 11
To fix TPM 2.0 and Secure Boot error to install Windows 11, follow these steps:
- Plug in your USB pen drive to your computer.
- Download Rufus to create bootable Windows 11 pen drive.
- Create bootable pen drive of Windows 11.
- Right-click on the Windows 10 ISO and select Mount option.
- Go to sources folder and copy all except install.esd or install.wim.
- Open your pen drive and go to sources folder.
- Paste all the copied files here.
- Install Windows 11 without TPM 2.0 and Secure Boot.
To get started, you have to plug in your USB pen drive to your computer and visit the official website of Rufus to download the software. It helps you create a bootable Windows 11 USB drive.
Next, run Rufus and create a bootable pen drive. Once done, you have to right-click on the Windows 10 ISO and select the Mount option.
Now, you can find it in the sidebar panel in File Explorer. Open File Explorer and switch to that and go to the sources folder.
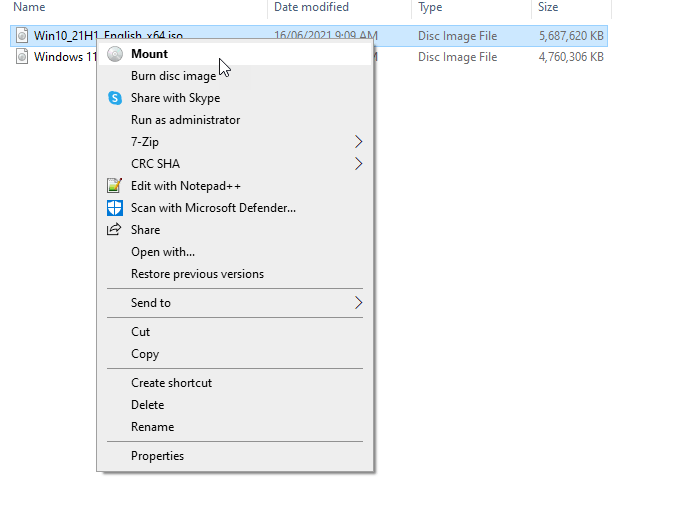
From here, copy all the files except install.esd or install.wim.
Now, open the bootable pen drive and go to the sources folder. Now, paste all the file here and replace the original files with Windows 10’s files.
Once done, you can boot your computer and start installing Windows 11 without TPM 2.0 or Secure Boot.
Windows 11 system requirements
Here are the minimum system requirements for Windows 11:
- Processor: 1 GHz or faster with 2 or more cores
- Architecture: x64 or 64-bit
- System firmware: UEFI, Secure Boot enabled
- TPM: Trusted Platform Module 2.0
- Storage: 64 GB or more
- Resolution: 720p or High Definition
- Graphics: DirectX 12 or later with WDDM 2.0 driver
Also, you must have an internet connection to set Windows 11 Home up with a Microsoft account. The Home edition users must have a Microsoft account to completely setup their device.
How to check if your PC can run Windows 11
To check if your PC can run Windows 11, follow these steps:
- Download PC Health Check app from Microsoft website.
- Install and run it on Windows 10/8/7.
- Click the Check now button to check if you can install Windows 11 on your PC or not.
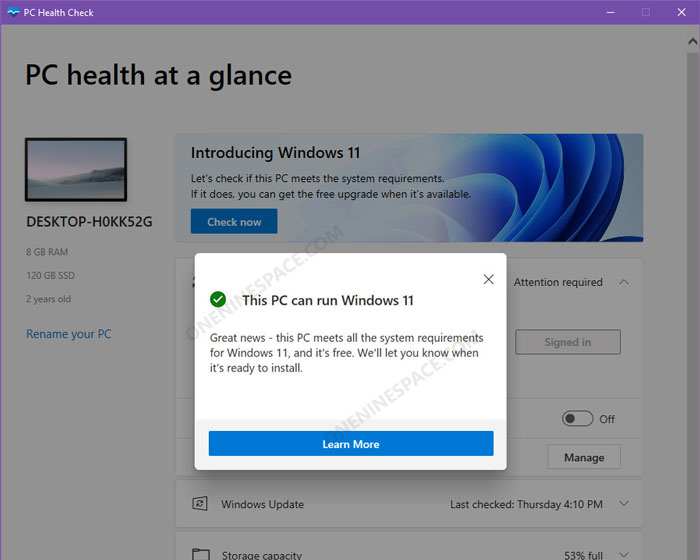
- If you get This PC can run Windows 11, you can install Windows 11.
- If you get This PC can’t run Windows 11, you cannot install Windows 11.
To get started, follow the following link to download PC Health Check app from the Microsoft website.
https://aka.ms/GetPCHealthCheckApp
Then, install the app and open it on your computer. You can find a Check now button on your screen that you need to click on.
If is shows This PC can run Windows 11, you can install Windows 11.
However, if you see This PC can’t run Windows 11, you won’t be able to install Windows 11. In that case, you can continue using Windows 10 or whatever version you are using. Alternatively, you can follow the aforementioned guide to fix and install Windows 11 without TPM 2.0 and Secure Boot.
Wrap up: Install Windows 11 without TPM 2.0 and Secure Boot
It is possible to fix or bypass This PC can’t run Windows 11 error and install Windows 11 without TPM 2.0 and Secure Boot using this tutorial. However, there is another method, explaining how you can do the same by replacing appraiser.dll file. However, we won’t recommend you downloading DLL file from a third-party resource due to security concerns.