DNS servers, provided by your ISP, are a medium to connect your computer to the internet. Without a correct DNS server, you cannot use the internet – no matter if you are using a mobile hotspot or Ethernet connection. However, at times, it might be the cause of your internet-related issues. In those situations, you can change DNS server on Windows 11/10 and fix it within moments.
Your Windows computer doesn’t fully comprehend a website name (www.oneninespace.com). It translates the name into an IP address, which is the backbone of any website. DNS helps your computer to understand that – hence, the importance of a DNS server.
When you connect to an internet connection (Ethernet, Wi-Fi, USB tethering), a set of DNS servers gets installed automatically. However, there could be times when you want to open Facebook when blocked in office or bypass other internet connection-related issues. In such a situation, changing the DNS server may fix it without further delay.
There are two ways to change DNS server on Windows 11/10 – using Windows Settings and Control Panel. Here we have mentioned both the methods, letting you perform the steps in your favorite utility.
How to change DNS server on Windows 11/10 using Windows Settings
To change DNS server on Windows 11/10 using Windows Settings, follow these steps:
- Press Win+I to open Windows Settings
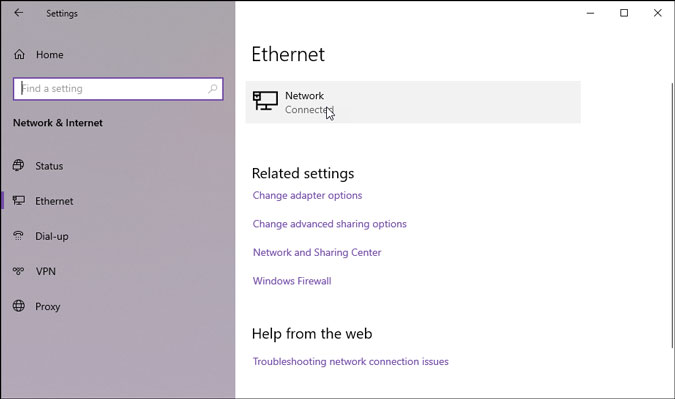
- Go to Network & Internet.
- Select the type of internet you are using and click on the network name.
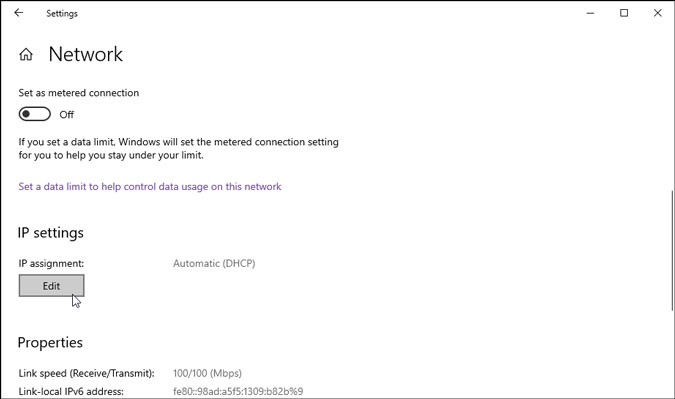
- Click on the Edit button under IP settings.
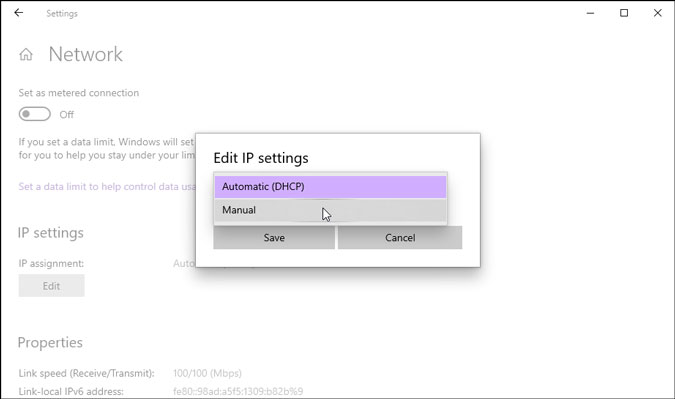
- Choose Manual from the drop-down list.
- Enable IPv4.
- Enter Preferred DNS and Alternate DNS server on Windows.
- Click the Save button.
At first, you have to open Windows Settings. Although there are so many methods, you can press the Win+I keyboard shortcut to get it done. Next, go to Network & Internet and choose the type of network you are using.
For example, there are Ethernet, Wi-Fi, etc. Then, click on the network name. In this case, it is Ethernet.
After opening the network settings window, find out the IP settings header, and click on the Edit button.
By default, it might be set to DHCP. However, expand the drop-down list, and select the Manual option and toggle the IPv4 button.
Now, enter the Preferred DNS and Alternate DNS server.
Preferred DNS: 8.8.8.8
Alternate DNS: 8.8.4.4
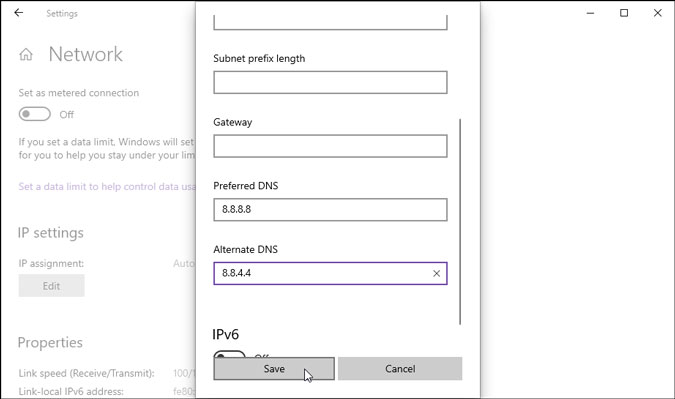
At last, click on the Save button.
Read: Full list of HTTP error and status codes
How to change DNS server on Windows 11/10 using Control Panel
To change DNS server on Windows 11/10 using Control Panel, follow these steps:
- Press Win+R to open the Run dialog.
- Type ncpa.cpl and press the Enter button.
- Right-click on the network name and select Properties.
- Double-click on the Internet Protocol Version 4 (TCP/IPv4).
- Select Use the following DNS server addresses.
- Change DNS server on Windows 11/10.
- Click the OK button.
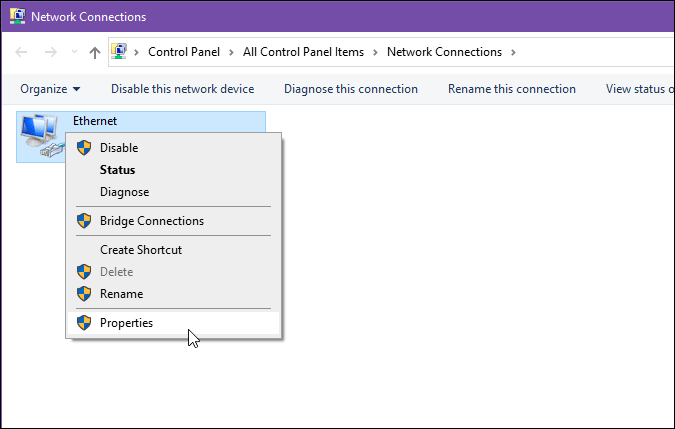
To get started, press Win+R, type ncpa.cpl, and press the Enter button to open the Network Connections window. Here you can find all the network names that you have been connected to.
Right-click on the currently used network name and select the Properties option in the context menu.
Next, double-click on the Internet Protocol Version 4 (TCP/IPv4) and select the Use the following DNS server addresses option.
Then, you can change DNS server on your Windows computer according to your choice.
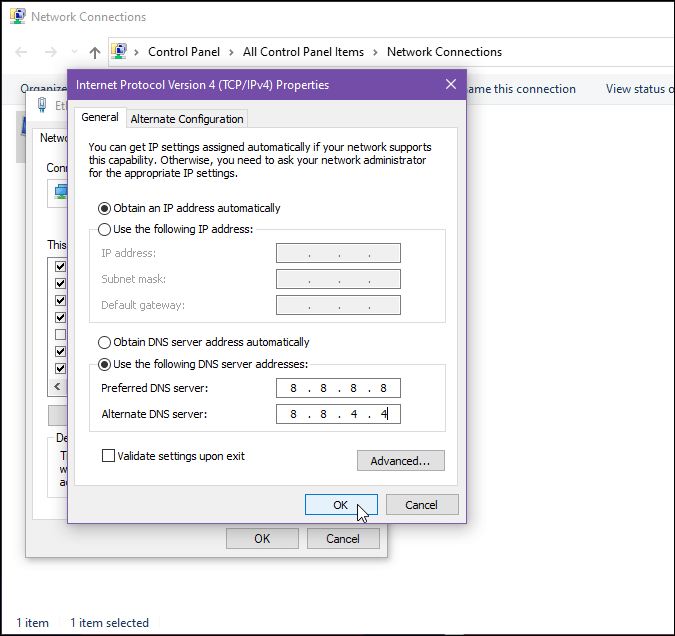
At last, click the OK button to save all the changes.
Can you change your DNS server on PC?
Yes, you can certainly change your DNS server on PC running Windows 11 and Windows 10. You need to open the Network Connections prompt in Control Panel, where it displays an option to enter your new DNS server as per your requirements.
How do I change my DNS server Windows 10?
To change DNS server on Windows 10, press Win+R > type ncpa.cpl > press the Enter button > Right-click on the used internet source > select the Properties option. After that, you can follow the aforementioned steps to get the job done.
How do I change my DNS to 1.1 1.1 Windows 10?
You need to use the 1.1.1.1 in the Preferred DNS server box in the Internet Protocol Version 4 (TCP/IPv4) Properties window. Following that, you can change the changes and restart your computer.
Can I use 8.8 8.8 DNS?
Yes, you can use 8.8.8.8 DNS or Google Public DNS on Windows 11/10 without any problem. It lets you bypass several region blocking and restrictions as you browse the web.
Read: How to Shut down or Restart Windows computer