If you are thinking to enable Grammarly for Gmail in Chrome or mobile app, this tutorial will be handy for you. It is possible to use Grammarly for Gmail in Chrome as an extension to send error-free messages. Whether you have the free or pro version, you can turn on Grammarly in Gmail without any problem.
Grammarly helps you emend grammatical errors along with punctuation, active/passive voice, etc. Apart from that, you can keep a similar tone throughout the entire passage to make it better for a reader. Whether you are a student, who writes tons of projects, an office employee, who writes a lot of reports, you can use Grammarly to get rid of mistakes from your writing.
Grammarly can be used in different ways, irrespective of the browser you are using. When it comes to using Grammarly in Gmail, you might not get the same user interface or option or Grammarly icon as other sites. That is why you might think that Grammarly is not working in Gmail. However, that is not the thing as it is possible to use the Grammarly Gmail integration without any problem.
Note: We have shown the process to use Grammarly for Gmail in Google Chrome as an extension. However, you can use other browsers to get the same thing done.
How to enable and use Grammarly for Gmail
To enable and use Grammarly for Gmail, follow these steps-
- Open Gmail in your browser.
- Click on Grammarly extension icon in Chrome.
- Sign in to your Grammarly account to enable and use Grammarly for Gmail.
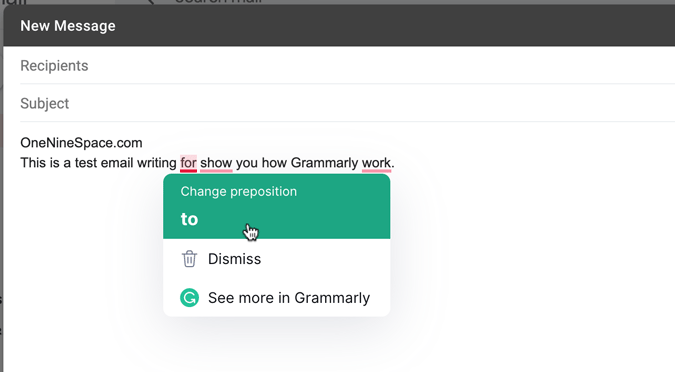
- Click on the red underlined text in Gmail message.
- Find the error and fix it.

At first, you have to open Gmail in your browser and make sure the Grammarly extension is installed in Chrome or any other browser. In case you do not have the extension, you can download Grammarly for Gmail extension from the following link-
https://chrome.google.com/webstore/detail/grammarly-for-chrome/kbfnbcaeplbcioakkpcpgfkobkghlhen?hl=en
Sign in to your Grammarly account by entering the credentials after clicking the Grammarly icon.
After that, Grammarly starts scanning the text as you write and shows all the errors by underlining. You can click on each of them, acknowledge the error, and start rectifying it.
If you want to use Grammarly for Gmail app on Android and iOS, it is possible too – thanks to the Grammarly keyboard app. Android lets you select a third-party keyboard and so does iOS – you can take advantage of this functionality to get Grammarly on Android and iOS apps while typing. Before getting started, make sure you have installed the Grammarly app on your phone. If not, you can download the Grammarly app from here:
For Android:
https://play.google.com/store/apps/details?id=com.grammarly.android.keyboard&hl=en_IN&gl=US
For iOS:
https://apps.apple.com/us/app/grammarly-keyboard-editor/id1158877342
How to enable Grammarly for Gmail app on Android and iOS
To enable Grammarly for Gmail app, follow these steps-
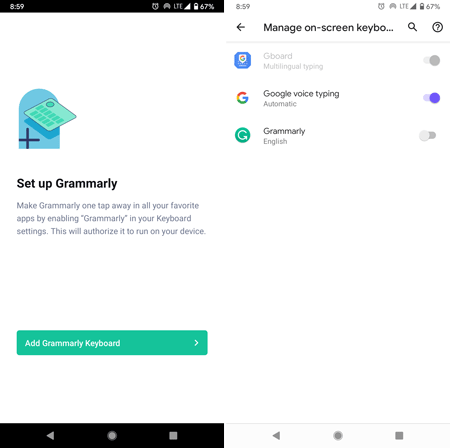
- Open the Grammarly app and log into your account.
- Tap the Add Grammarly Keyboard button and enable Grammarly button.
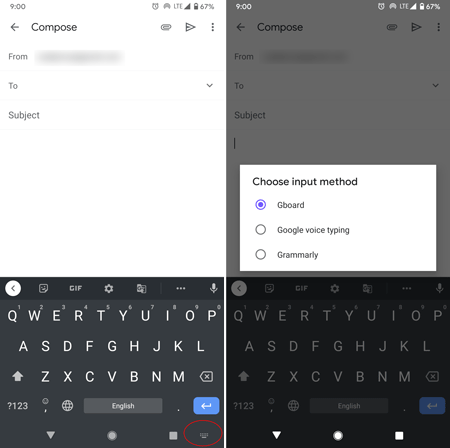
- Open Gmail app and tap the keyboard icon.
- Choose Grammarly from the list to enable Grammarly for Gmail app.
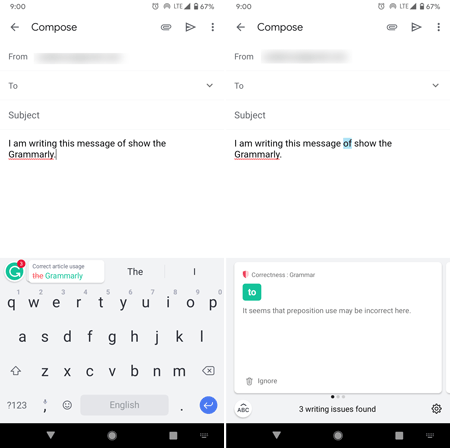
- Start composing your email message.
- Find all the red-underlined errors.
- Tap on the Grammarly icon to find your mistakes and rectify them.
To learn more about these steps, keep reading.
1: Open the Grammarly app and log in to your account to get started with.
2: Following that, tap on the Add Grammarly Keyboard button and toggle the Grammarly button to enable it.
3: Open the Gmail app and tap on the keyboard icon visible on your existing keyboard.
4: Choose Grammarly from the list to enable Grammarly for Gmail app.
5: Now you can start composing your message. As you write, it shows all the errors in red underline.
6: You can tap on the Grammarly icon to find your mistakes and redress them accordingly.
We have shown the steps on Android. However, you can follow the same steps on iOS as well. However, you need to choose the keyboard by these steps.-
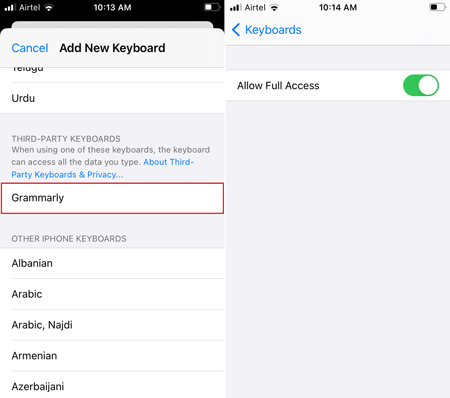
Open the Setting app and Tap on General > Keyboard > Keyboards. Here you can find an option called Add New Keyboard. Tap on it.
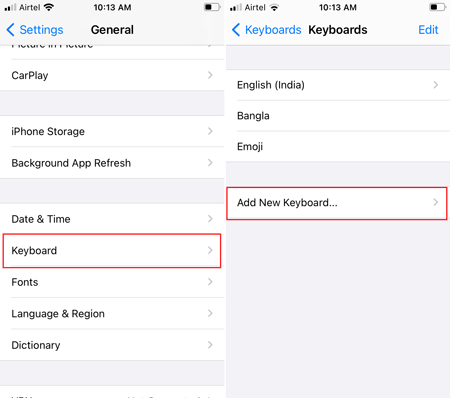
Scroll down to the THIRD-PARTY KEYBOARDS and select Grammarly. Tap on the Grammarly and toggle the Allow Full Access button.
Open the Gmail app and start composing an email message. Once the existing keyboard appears, tap on the globe icon and select the Grammarly option.
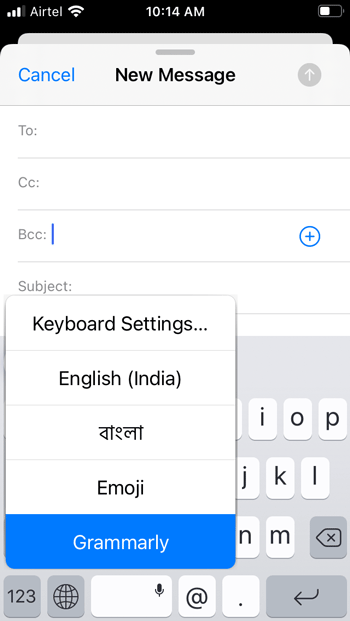
Now start writing your email and as you do, it shows all the errors. Tap on the Grammarly icon to find your mistakes and rectify them.
Final word: Enable and use Grammarly for Gmail
It is very easy to enable Grammarly for Gmail – whether you are using Chrome, Firefox, or Edge browser, or the mobile app. As it is quite straightforward to make the Grammarly Gmail integration happen, you do not have to spend much time on it.